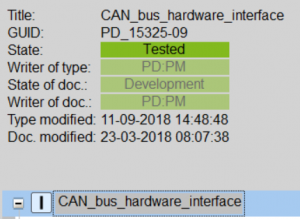
This tutorial assumes a basic knowledge of VIGO6. It aims to explain how to build a component that can send and receive CAN-bus data. You can find the demo_project in VIGO6: PD_22943-01 – CAN_bus_demo. Further, you can find the components in the catalogue: PD_22861-01 – CAN-bus-demo. In addition, you can find more information in the documentation for the CAN hardware interface, PD_15325-09.
PD610 CAN features • 16 individual CAN telegrams (different IDs). Either transmit or receive • 11 bit CAN ID; (CAN 2.0A)
The CAN-module we use in this example
PEAK PCAN-MIO industrial
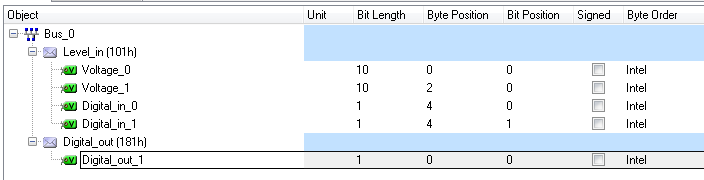
One of the telegrams has two voltages with a resolution of 10 mV. In addition, it has two digital input values. Its COB-ID is 101(HEX) and the byte order is Intel(little-endian)
The other telegram has a digital output. COB-ID is 181(hex) and byte order Intel(little-endian)
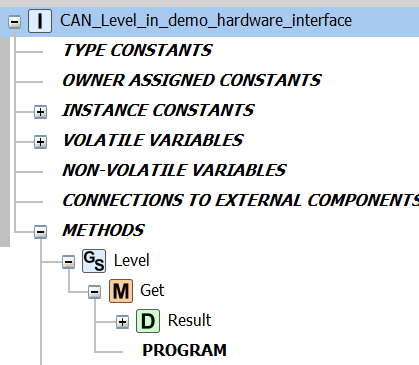
Make your own CAN-telegram interface (converter) as a descendant of the basic CAN-bus hardware interface.
You need to make one interface for each CAN-telegram. We will work with the CAN-telegram Level_in.
The CAN bus hardware interface
Hardware Interfaces are subcomponents, so you must add them to a component.
Create a new component as a descendant of the process-component and add your CAN hardware interfaces to it.
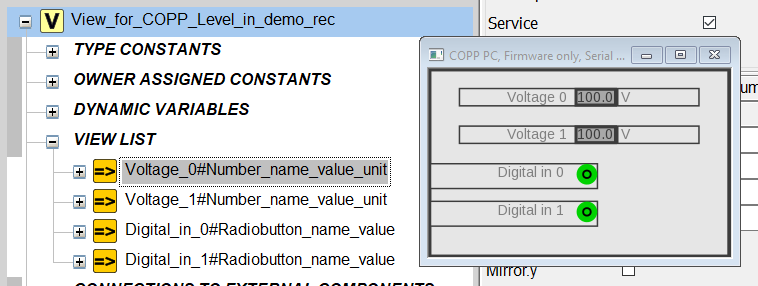
Raw CAN-telegram in VIGO6
Digital_in_0 and Digital_in_1 – pick datatype uint8 (1 byte). Voltage_0 and Voltage_1 – pick datatype uint16 (2 bytes)
Where to place the data
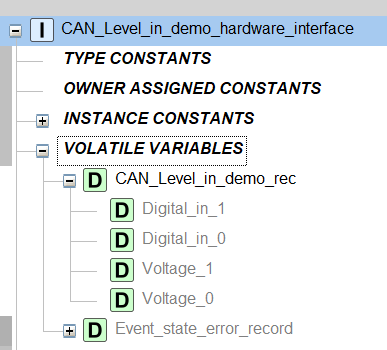
Add the CAN-record in the volatilevariables section of your CAN bus hardware interface.
NB: The CAN-record must be the first volatile data you add. In this way, the data has offset 0, from the COPP-editor’s point of view, and we need that for our coming mapping. "Mapping" is a CANopen term, which can be translated to "location of data".
Mapping of the CAN telegram data in COPP
1. Set CAN ID The CAN_ID is 11 bits, but often used as 4 bit and 7 bit (see illustration)
In our case, we have a COB_ID, which is a representation of all 11 bits.
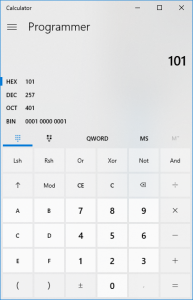
The COB_ID is 101 in HEX – which is (0)00100000001 in binary
Tip: the standard calculator in windows can be switched to “programmer” and then you can see the conversions.
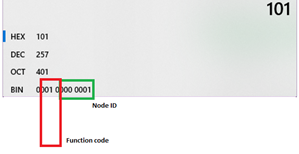
Now divide the 11 bits into 4 bits function code (0010) and 7 bits NodeID (0000001) We need to enter a decimal value into the editor, so we must convert the two binary values to decimal.
For example – function code = 2 and NodeID = 1
2. Select CAN device role The CAN device role shows whether the telegram is data that the CAN device expects to receive or whether it is data it can send. In the case of our telegram Level_in, this is data the CAN device wants to receive (hence the “IN”), so we set can device role to “receiving”.
3. Set mapping Now, we need, bit by bit, to indicate the transfer of bits from the CAN-telegram into proper COPP–variables. This happens in two steps.
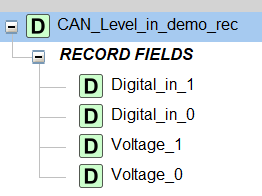
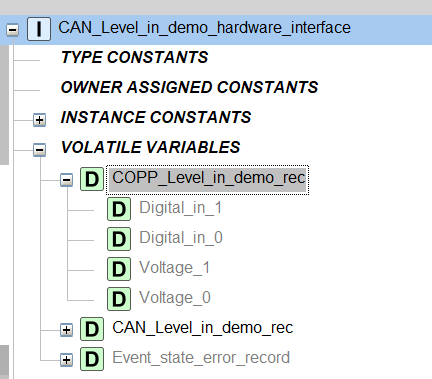
First, we transfer the bit-stream into a record structure of uints (CAN_level_in_demo_rec)
Next, we convert the data from the uint record into a record structure of proper COPPvariables (COPP_level_in_demo_rec)
CAN_level_in_demo_rec
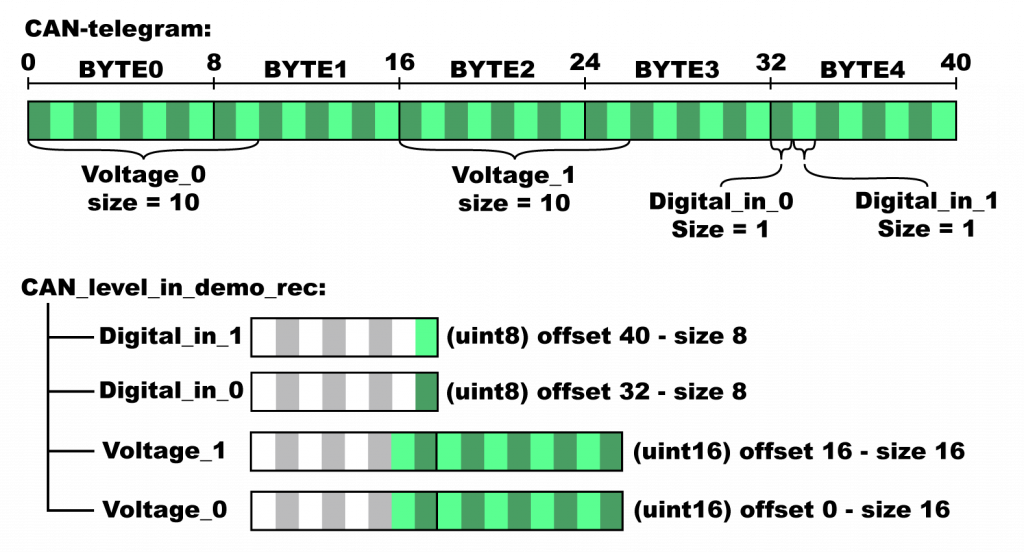
The CAN telegram definition was:
We see that Byte order is Intel = little-endian, so the least significant byte is sent first.
Hence, the first data we receive is Byte 0, then we receive Byte 1 for example.
So the operation we need to perform is this:
We need to tell the CAN-hardware-interface, which bits from the CAN-telegram that must move into which parts of the data structure of the CAN_level_in_demo_rec.
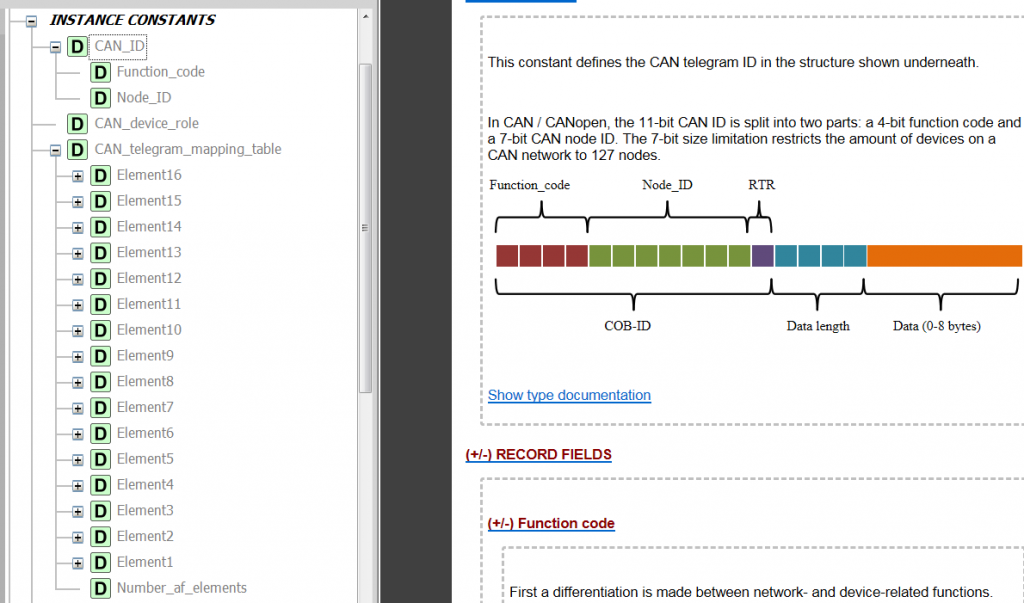
We have a total of 4 elements (Voltage_0, Voltage_1, Digital_in_0 and Digital_in_1).
Each element need to be inside the CAN-hardware interface, through the instance constant “CAN_telegram_mapping_table”
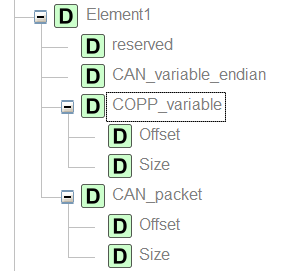
Each element has the structure:
We do not use Reserved. CAN_variable_endian can be “little” or “big”. In our case it is little.
“CAN_packet” represents the CAN-telegram structure and COPP_variable represents the COPP data structure – in our case “CAN_level_in_demo_rec.
The size shows the number of bits to be sent (and NOT the size of the data structure element), and the Offsets must be in bits.
Note that for the first three elements, offset and size are the same for the CAN-telegram, and the CAN_level_in_demo_rec. But for element 4 (Digital_in_1) the offset in CAN is 33, whereas it is 40 in the CAN_level_in_demo_rec.
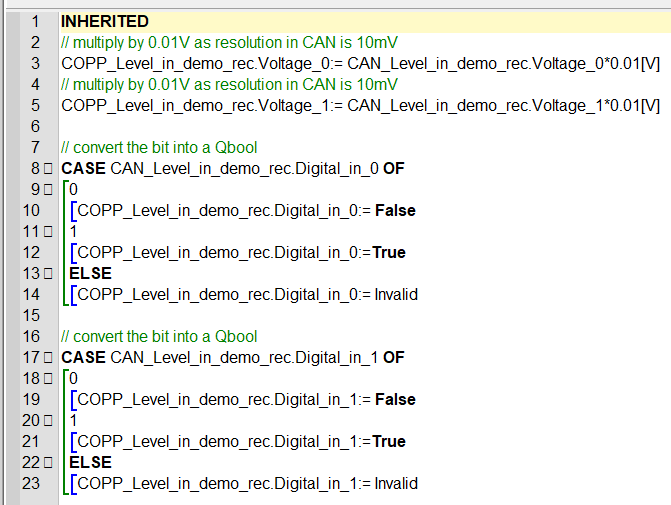
Now we have data in CAN_level_in_demo_rec. But the data are represented as Quints, when in fact, they are floats (Voltage_0 and Voltage_1) and Booleans (Digital_in_0 and Digital_in_1). So we map from CAN_level_in_demo_rec to a structure of floats and booleans that we call COPP_level_in_demo_rec.