16. HOW TO DISPLAY A BLINKING MESSAGE FOR A VARIABLE
HMI flashing
PD provides a prebuilt component that implements "flashing" of a constant message on max. 20 characters. The first section of this tutorial explains how to use the component. The second section explains how the component is programmed.
SEE HOW IT WORKS
Play Video
Using the prebuilt component
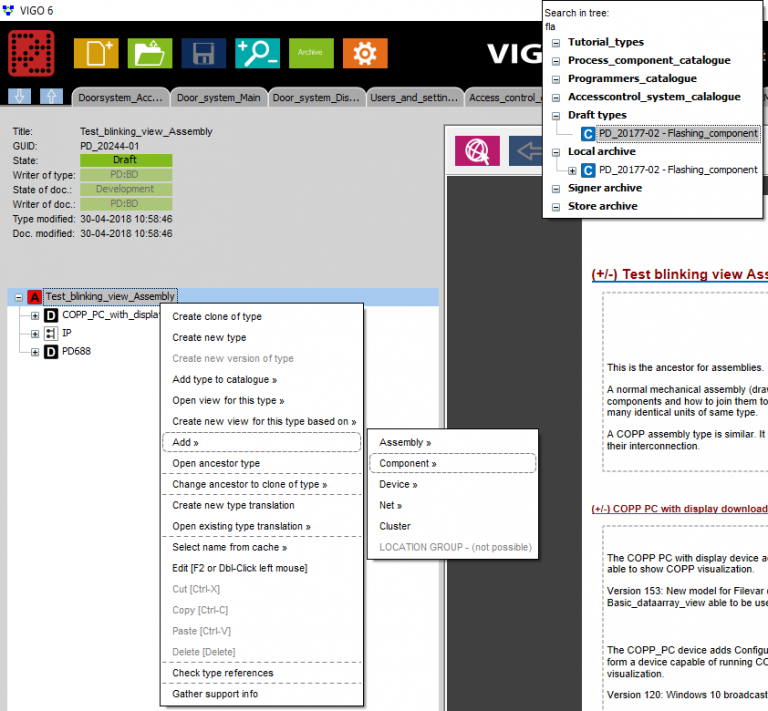
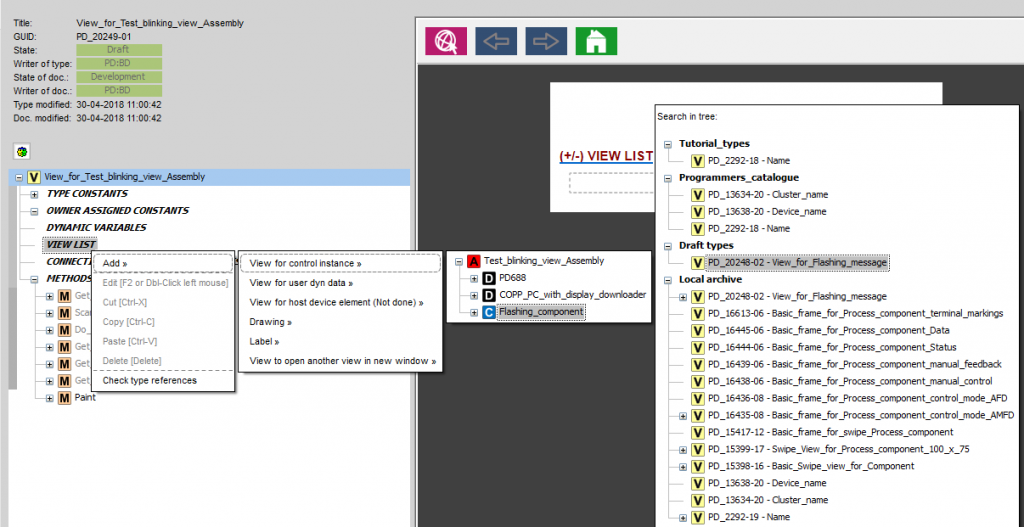
The ”Flashing_component” GUID: ”PD_20177-02” uses three instance constants and a Boolean register value to control a flashing message box. To use the component, add it to the assembly that needs a flashing message (Figure 1) and place the “View_for_Flashing_message” GUID: “PD_20248-02” for the flashing component in an assemblyview where the message should flash (Figure 2 and Figure 3).
STEP 1:
First thing you need to do is to add the component to your assembly.
Figure 1: Adding flashing component to the assembly
STEP 2:
Then you have to add the view for the component in the view list.
The instance constant “Message” is a 20 char string containing the message to display; the default value is “Hello World!”. “Message_flash_on_time” is a float 64 of quantity type “ time difference” indicating the duration the message is visible in one flash cycle. “Message_flash_off_time” is the duration that the message is invisible in one flash cycle. Both time instance constants have a default value of 0.5 seconds.
When writing “True” to the “Flashing_enable” register in the component the message will start flashing. Comparable when writing “False” to the “Flashing_enable” register the message will stop flashing and stay invisible. To make the flashing as fluent as possible, the flashing component should be located in the same device that uses the flashing view.
How the prebuilt component is programmed
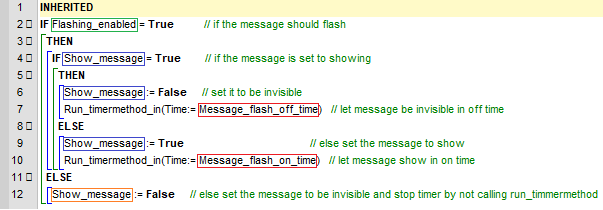
The flashing functionality in the flashing component is controlled by a timer that uses two float 64 time difference values. These are shown in (Figure 4, red), and one of them is used to control the amount of time the message is shown in a flashing cycle. The other float 64 is used to show the amount of time the message is invisible in a flashing cycle. "Show message" Qbool (Figure 4, blue), is used to tell if the message should be drawn or not. The "Flashing_enabled" Qbool (Figure 4, green), tells if the message should be flashing or stay invisible. If the Qbool dictates the message to stay invisible, the "Show_message" (Figure 4, orange) is written false resulting in the timer stopping the message from flashing.
Figure 4: Flashing_timer timermethod
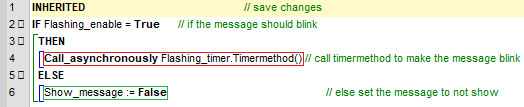
The flashing timer is started by the “Flashing_enable” register when the set method is called, and the value it receives is “True” (Figure 5, red). Furthermore, the message is set to invisible when the register receives “False” (Figure 5, green). The timer method itself stops the next time it runs and the “Flashing_enabled” Qbool is set “False”.
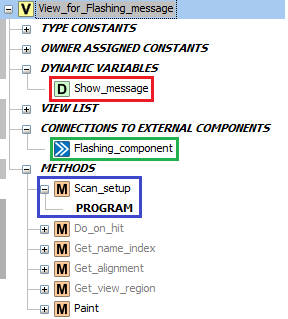
The view has a connector to the “Flashing_component” (Figure 6, green) and a dynamic Qbool variable “Show_message” (Figure 6, red) that is connected with an auto-refresh operator to “Show_message” value in the “Scan_setup” (Figure 6, blue) program (Figure 7).
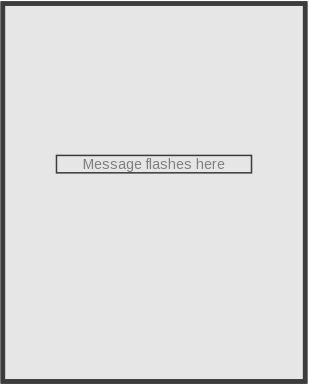
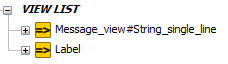
The flashing view contains two view list elements (Figure 8). One of the elements for the message itself, and the other a label to tell the user in edit mode how large the view is, and its function (Figure 9).
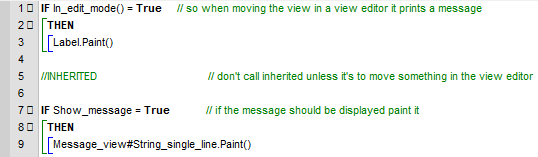
To make the message flash, the “Paint” method is overridden with the code shown in Figure 10. In the figure on lines 1 to 3 the labels "paint method" is called if the view is opened in edit mode. On lines 7 to 9 the message "paint method" is called if the “Show_message” value is true.
*Extra If you would like the view to flash with a drawing instead of a message is simple to implement. First, change the view region for the view so it fits your drawing. Then either change line 3 in the paint method program to paint a box around the entire view. This is for you, as a user, to know the area the drawing will be flashing in. And then change line 9 to paint the drawing. Another option is just to paste the drawing right into the section from line 3, and afterward and then also on line 9. This results in the drawing been shown static in the editor mode instead of just showing a frame.