The system has two separate parts. One part is in the VIGO6 environment. The other part is a seperate program that you can use to translate the texts that you "extract".
Integrated part:
Independent program:
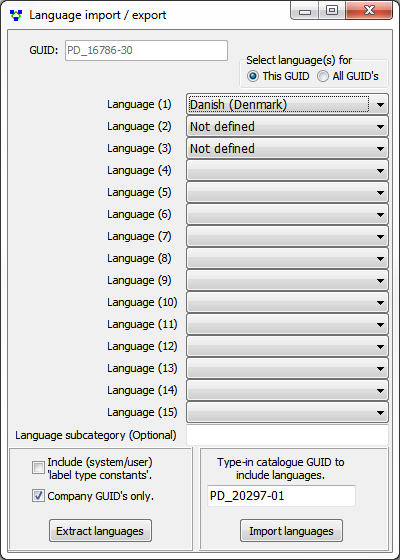
1. Select the visualizationGUID that needs translations. You can only translate the texts from the visualization you select.
2. Choose the languages (up to 15) that you want to translate. However, if you need to translate many different views to the same languages, then select the option “Select language(s) for ”: All GUID’s.
Normally, you should not check the "Include label type constants’" option. As an example, you can use the option for special ASCII characters above 127. Probably, you only need to translate the GUID‘s that the company own.
3. Click on "Extract languages" and wait until VIGO6 is done with the extraction. At the end of the extraction, select where to put the language file ("LanguageList.vtr"). The default path is “Documents\LanguageList.vtr”. Now you can send the file and the translator program to the person who will translate the texts.
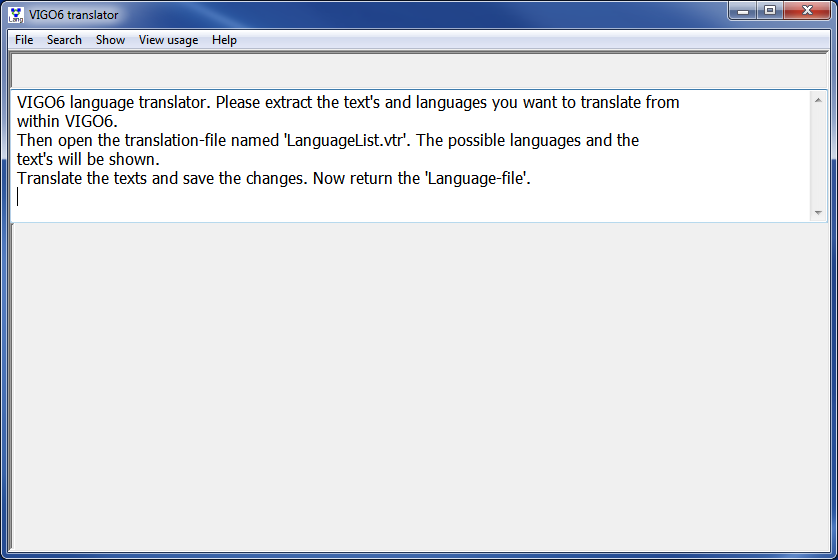
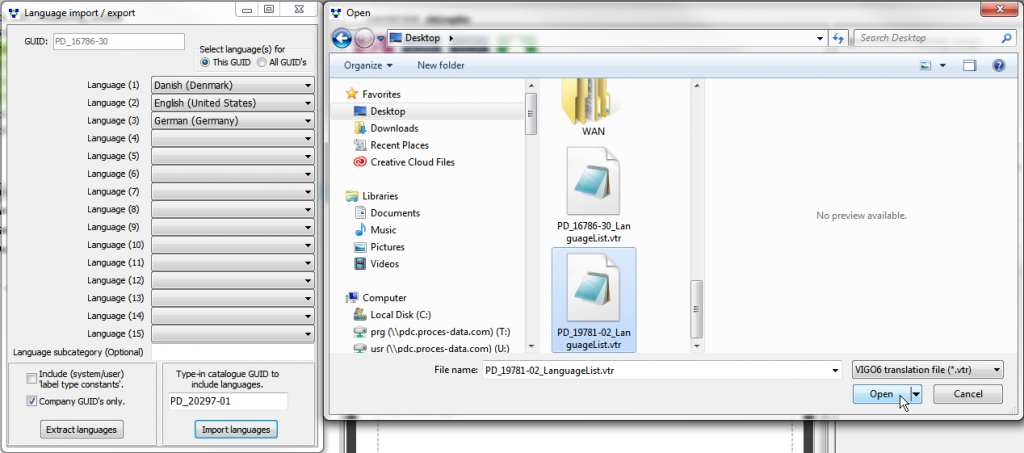
4. Start the VIGO6 translator program and open the translation file.
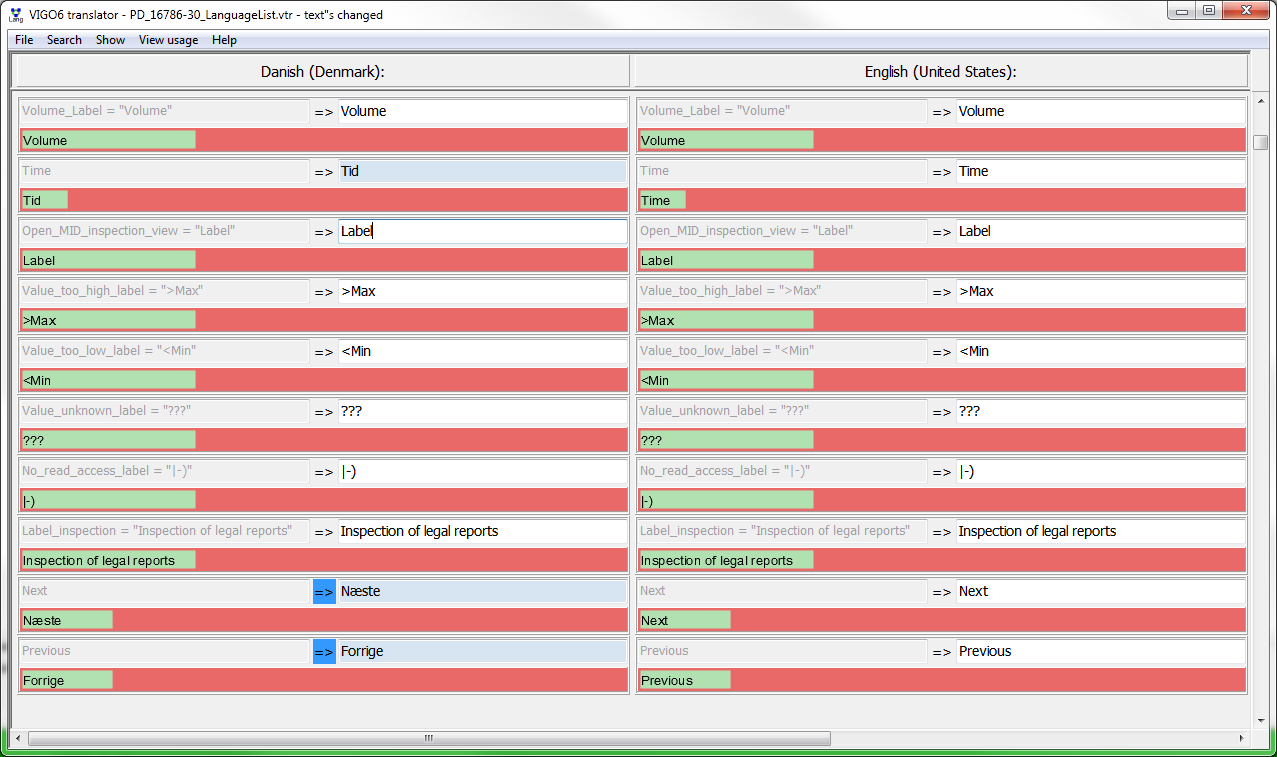
5. You can now begin to translate the texts. When you change a text, its background changes to light blue.
In case a language GUID for a text already exists, you can see a dark blue color for the “=>” symbol
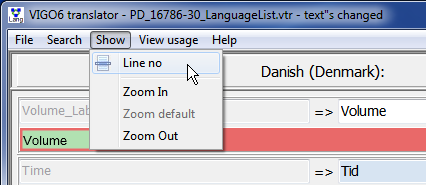
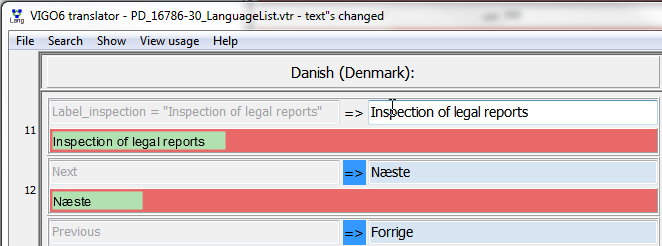
You can show line numbers by:
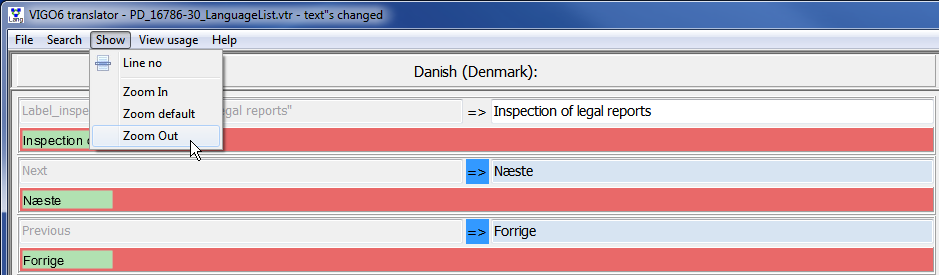
In addition, you can zoom the width of each language column:
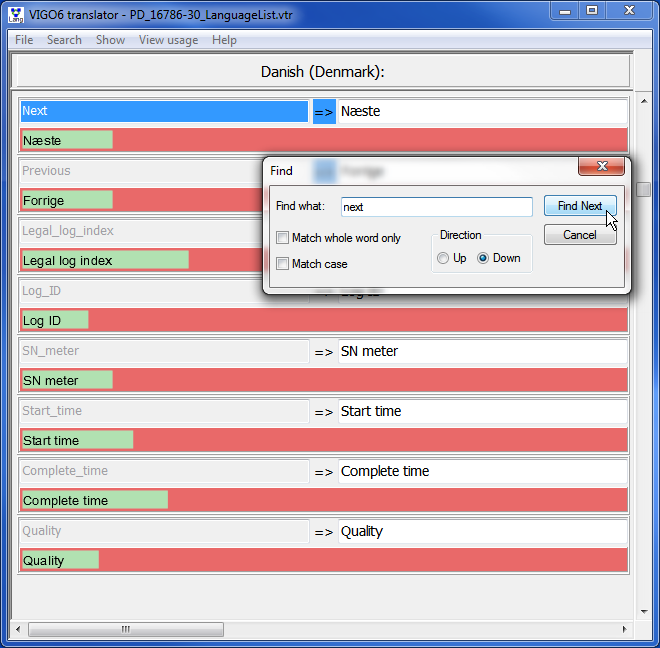
You can also search for a text within the translation file. As a result, you can see the line with the text you search for, as the first entry in the editor window. It has a blue or white color, as you can see below.
But, if there are fewer lines ‘after’ the line, this can’t be shown as the first line. You may need to scroll through the languages to find the text.
6. Along the way, and when you are done, the system will save changes in the same – or another file. Now you have to return the file to the sender, for import back into VIGO6. (Only the exporter can do the import.)
7. Importing the texts takes place via the same dialog as the export. To clarify, type in the GUID of the catalogue, that should hold the translation. When you press "import language", you get a prompt to find the visualizationGUID that you exported from.
To summarize, you have loaded translations into your catalogue. Next time you build and download the program that holds the visulization, you will then include the new translations.