• Introduction • General • Exporting data to MariaDB database using MySQL Driver • Exporting data to Excel using Microsoft Excel Driver – Hints • Troubleshooting – Last_error – ODBC driver tracer
Introduction
This tutorial shows how to export data from VIGO6 to a database management system (DBMS) or an Excel spreadsheet using the ODBC database driver on Windows.
We expect that you are familiar with VIGO6, otherwise see.
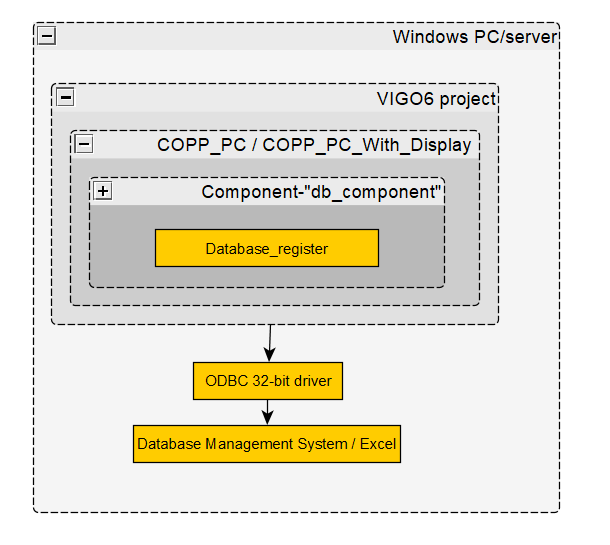
You can see the architecture of the system in Image 1: Architecture of a sample VIGO6project using the Database_register.
The system runs on a Windows PC or Windows server with ODBC database drivers. To clarify, ODBC drivers are dynamic link libraries that create an interface to exchange data between applications and data sources, while using SQL as a standard. In addition, there are both 64-bit and 32-bit drivers, but VIGO6 uses the 32-bit drivers.
However, we have only tested the “Microsoft Excel Driver (*.xls)”, “MySQL ODBC 3.51 Driver”, “MySQL ODBC 5.3 Driver”, and “MySQL ODBC 8.0 Driver”. When you use the MySQL ODBC driver you can use MySQL or another MySQL alternative as MariaDB or PostgreSQL. But we have only tested MariaDB and MySQL.
NB: We suggest, that you only use characters between a and z and underscore for naming tables and table elements, as some ODBC-drivers can’t handle special characters.
The tutorial doesn’t cover how database servers or databases work. As an example, we use a MariaDB database server in the example with the MySQL database driver. We have called the database “vigo_db_test”, and it has a table “temperature_regulation”, as seen on Image 2:
Image 2: The database used in the tutorial.
You can see the structure of the table on Image 3: Structure of the table “temperature_regulation” in the database “vigo_db_test”
GENERAL
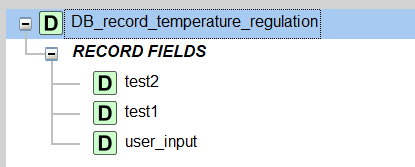
1. In your VIGO6 editor, create a record with the data you want to export (Image 4).
Important information on naming: Avoid names for record fields with any reserved keywords, such as : Count, time, max, min, reverse, replace, and, or, insert.
Stick to characters a-z and numbers – underscores are also ok.
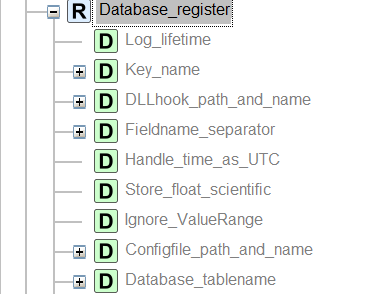
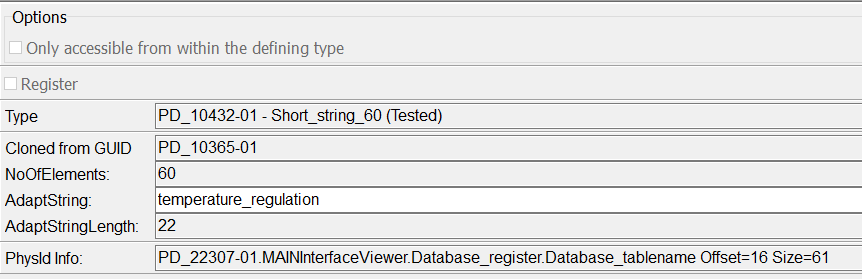
Image 5: An overview of the configuration parameters for the Database_registe
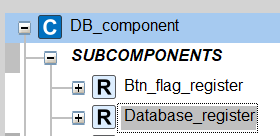
2. Add the Database_register to your component and assign the data field to it.
You can change the output generated by VIGO6 for your Database_register through parameters that you can find in the subcomponent, as you can see on Image 5:
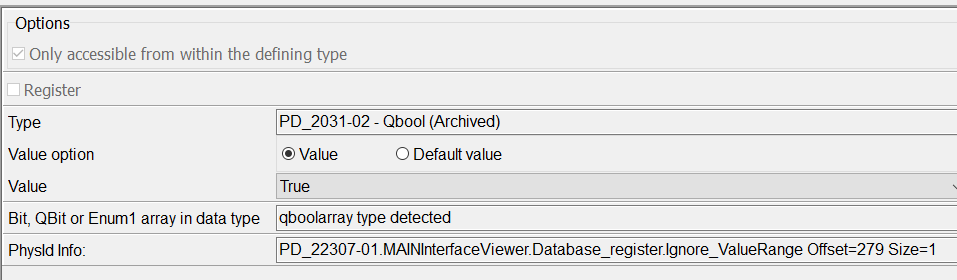
3. Fields in the record need to have correct ranges. In the case, that you don’t want to specify ranges, you set “IgnoreValueRange” to true (Image 6).
Image 6: Configuring Value ranges.
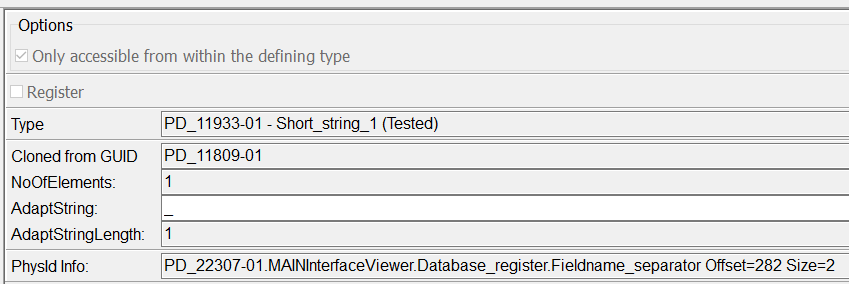
4. When you work with a nested record structure, the “Fieldname_seperator” is important. You can use The fieldname_seperator to specify which symbol VIGO6 uses to express the nested structure in a flat string. We have set it to “_” in this example (Image 7).
Image 7: Setting fieldname seperator.
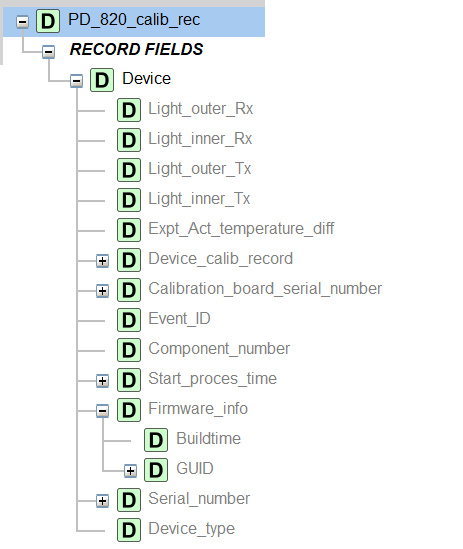
To illustrate how it works, you can see a record structure “PD_820_calib_rec” that uses nested records on Image 8.
Image 8: PD_820_calib_rec, an example of a nested record
With “_” as fieldname seperator, the start of the nested representation is as follows: “Device_Device_type,Device_Serial_number,Device_Firmware_info_Buildtime, Device_Firmware_info_GUID, …….” The output is a flat string, that you can insert into a flat database.
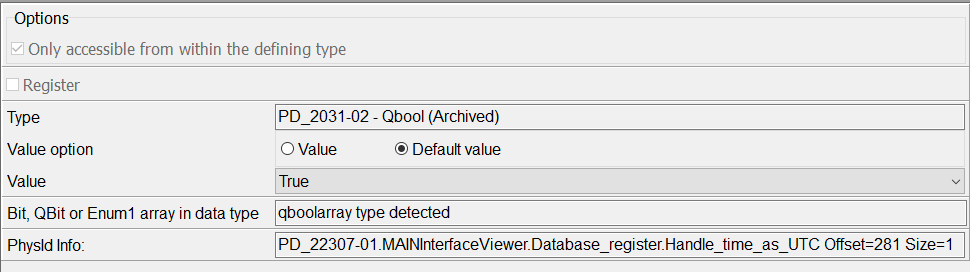
5. Make sure that you handle time as UTC (Image 9):
Image 9: “Handle_time_as_UTC” set to true.
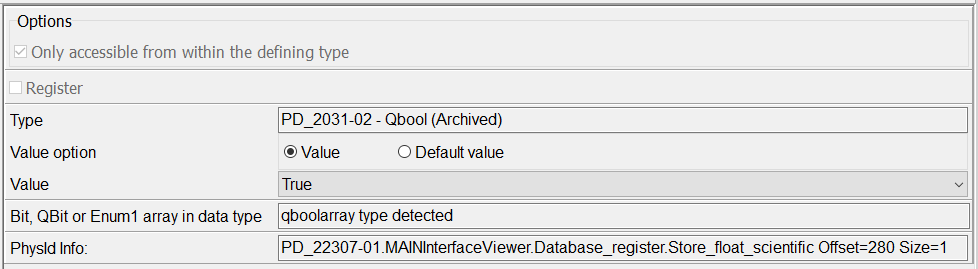
6. Consider how you want to store floating point values. When you set “Store_float_scientific” to true, VIGO6 stores floats with scientific notation (Image 10). :
Image 10: “Store_float_scientific” is set to true.
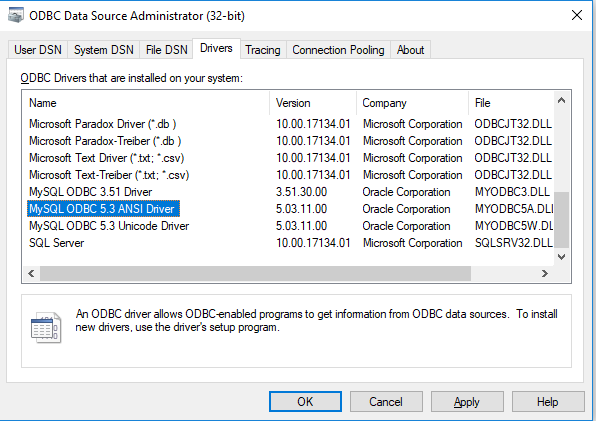
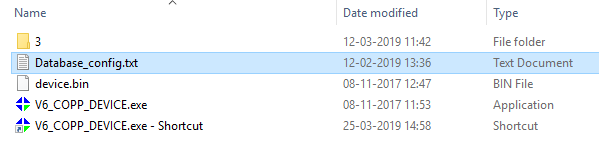
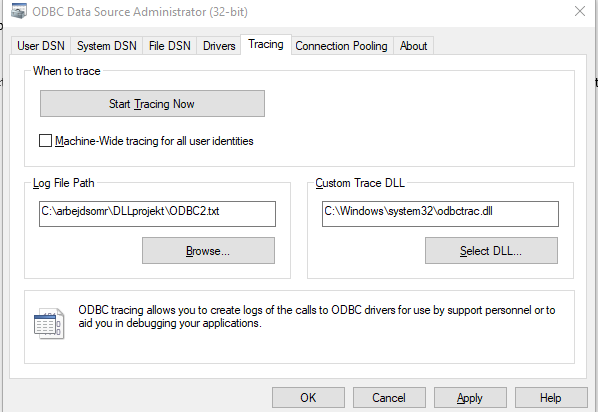
7. You set up your ODBC-driver through a simple text file. The default path is in the folder with your COPP PC, and the default name is “Database_config.txt”. The config-file contains a ConnectString with instructions for the ODBC-driver. However, if you want to use a path that differs from the default path, you need to set it in “Configfile_path_and_name”. You can get an overview of the drivers in the ODBC Data Source Administrator (Image 11).
Image 11: OBDC Data source Administrator window with some of the drivers.
The path is: Windows button > ODBC Data sources (32-bit) > Drivers
The content of the ConnectString depends on your needs. We have used specific examples of ConnectStrings with the MySQL and Excel drivers.
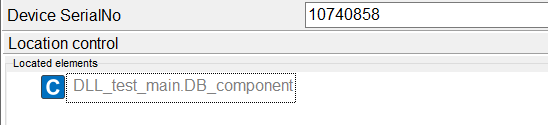
8. In your component with your register, pick your db_register, and mark “3rd party interface” (Image 12:):
Image 12: Mark “is available” for 3rd party interface
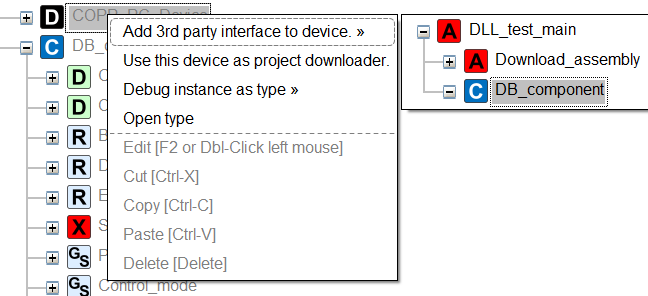
9. First, ho to your projectview, and locate the component with the Database_register in your COPP_PC. Second, right click on the device, and “Add 3rd party interface to device”. Last, choose the assembly or component where you have your db_register (Image 13):
Image 13: Adding 3rd party interface to device where your Database_register is.
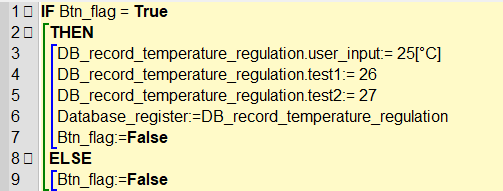
10. When you add the data to the Database_register (see line 6 on Image 14), the system will write the data to the database. It is not enough to assign the data to the variable exposed in the database register (lines 3-5 on Image 14). Line 6 is crucial.
Image 14: Simple example of writing to your Database_register when pressing a button. Btn_flag is set to true when the button is pressed.
Exporting data to MariaDB database using MySQL driver
You follow the same steps as we defined in “General”. We describe the application specific steps here.
We have used a MariaDB database server in the example with the MySQL database driver, where the database is called “vigo_db_test”. It has a table with the name “temperature_regulation”. You can see the setup in Image 15:
Image 15: The database used in the tutorial.
You can see the table on Image 16:
Image 16: The table “temperature_regulation” in the database “vigo_db_test”
1. Create the config file. Create an empty text file with the name “Database_config.txt” in the folder with your COPP PC (Image 17):
Image 17: A configfile in a folder with the COPP PC.
2. Create the connectString in the config file. First you need to chose your driver. We use “MySQL ODBC 5.3 ANSI Driver”. You have to add the server address, port number, user ID, and password:
Image 18: A ConnectString using a MYSQL driver for a MariaDB database server, with the database “vigo_db_test, with UID=root and PWD=1234.
3.Add the table name from the database in “Database_tablename”:
Image 19: Add the name of the table in “Database_tablename”.
Exporting data to Excel using Microsoft Excel Driver
You follow the same steps as in “General”. Here, we describe the application specific steps.
1. Create an Excel workbook: You can use the 32-bit OBDC driver for Microsoft Excel that works with Excel 97-2003. Just remember to save as the correct version when you save your workbook in Excel:
Image 20: An excel workbook with the spreadsheet where you export data from Vigo6 to.
2. Make the columns from your workbook and record in VIGO6 match:
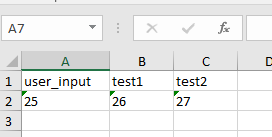
Image 21: The data structure is above, and the corresponding excel spredsheet with the columns and value from the first write is below.
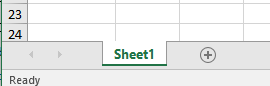
3. Write the name of the sheet of your excel workbook in Vigo6 database register > Database_tablename. If the name of your sheet is sheet1:
Image 22: Example of where to find the sheet name in an open workbook with a spreadsheet called “Sheet 1”.
Write [Sheet1$] (Image 23):
Image 23: A picture of where to insert the name of sheet 1 in your Database_register.
4. Creating the config file. Create an empty text file with the name “Database_config.txt” in the folder with your COPP PC (Image 24):
Image 24: A configfile in a folder with the COPP PC.
In the connectString, choose the 32-bit OBDC driver for Microsoft Excel, and write the exact path for your excel file:
ConnectString=Driver={Microsoft Excel Driver (*.xls)}; DBQ=C:\arbejdsomr\odbc_excel\db_workbook.xls; READONLY=0; READONLY = 0 specifies the connection to be updateable. Parameters for the ConnectString are seperated by ‘;’.
– Hints The COPP_PC opens the file from the ConnectString when you write to it. While the file is open, it blocks other users from using it. The COPP_PC doesn’t close the file after a write.
If you open the COPP_PC and write to the excel spreadsheet, the COPP_PC locks the file, and you can’t open it, until you close the COPP_PC.
If you open the excel spreadsheet first, and open the COPP_PC afterwards, it will attach to your open session. You can have the spreadsheet open, while writing to it.
Troubleshooting
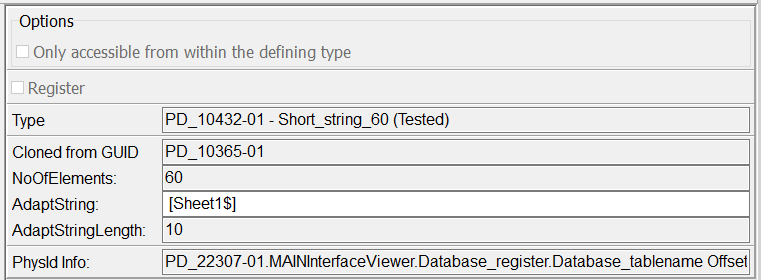
Last_error You can use “last_error” in your view, to get a 56 -byte error message from the OBDC-driver.
In the database register, there is a Get/Set method that you can use in your view in order to get 56 bytes of any error messages. An example is when there is no connection to the database. Another example is when there is a syntax error in your SQL statement (Image 25):
Image 25: Top: The Last_error Get/Set method in the Database_registor. Bottom: A visualization for a component with a database register, where Last_error is visualized as a String_name_value
ODBC driver tracer
1. Open the tracer and specify a log file path: Windows button > ODBC Data sources (32-bit) > tracing