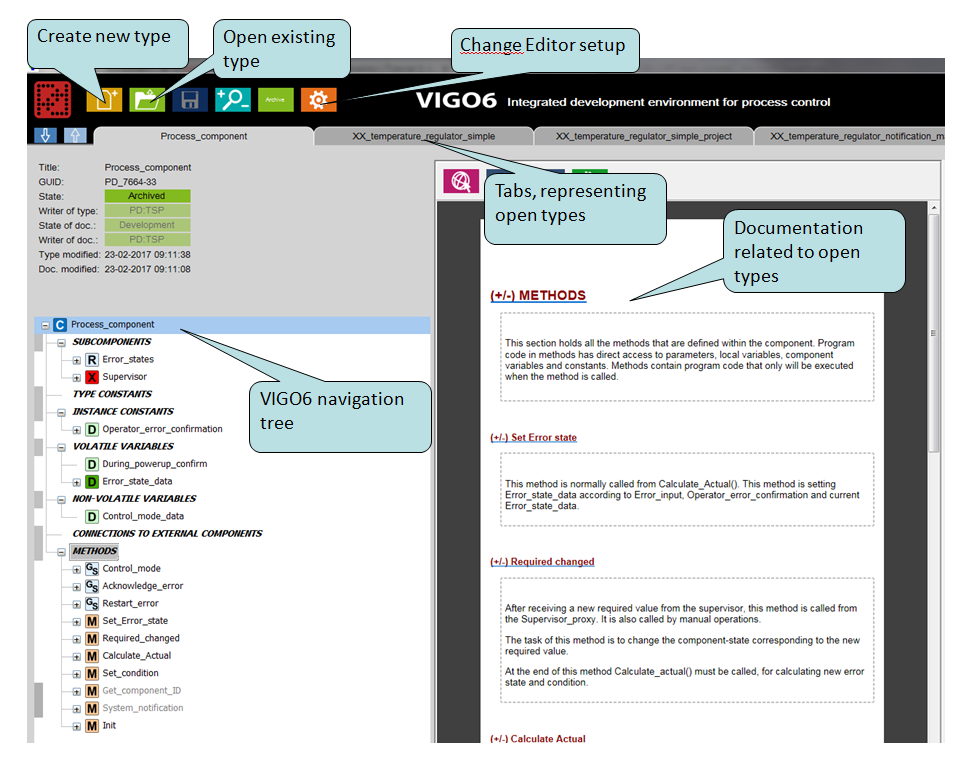
THE VIGO6 EDITOR

VIGO6 arranges the COPP types in a tree structure, like the navigation pane in Windows File Explorer.

Each type has a little icon, that lets you spot the types in the tree. For example, a component type has a C icon.

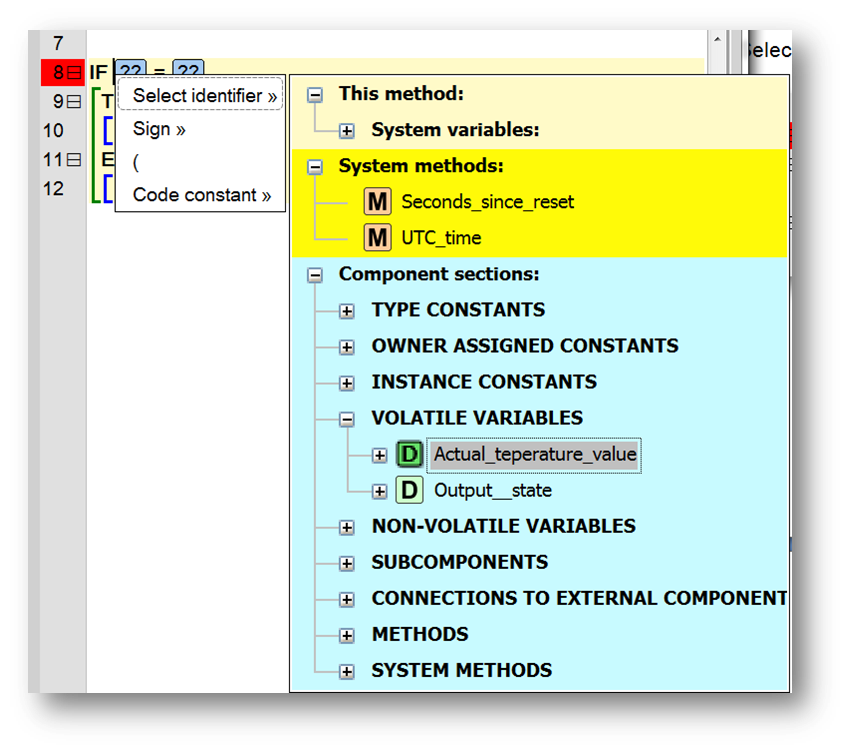
You can define data types, constants, and variables in the tree.
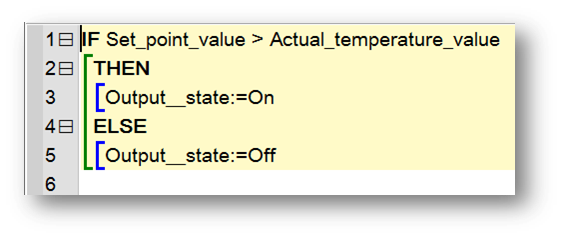
When you change the name of a type, VIGO6 updates the program code for you.

You can navigate with the four arrow keys or the mouse. You can open more than one type at the same time, with the use of tabs.

To the right is the properties section. Where you can see the properties for the types you select in the tree.
You can also configure your type here. For a project, you can choose the language, color theme, and more.
 
Another example is a device, where you can set the serial number from the project view.

SEE HOW IT WORKS

Play Video

POPUP MENU

When you right-click in the editor, a popup menu will appear. It shows the choices of correct program code at that spot. You can place the cursor at the start of a code line or just after the last text, In effect, you don’t have to learn the whole syntax at once.

Further, the popup menu preloads control structures that you can use as code templates.

COPP NOTATION WITHOUT BEGIN AND END

A block in a COPP program doesn’t use a BEGIN and an END. Instead of "BEGIN" you use an indentation, while a reverse indentation means "END". 

With indents, you create a tree-like structure where the indents show the level structure of the code. The editor inserts vertical lines and highlights the current block that makes it easier to read.

THEN and ELSE are sub-structures to IF and have the same indentation. Plus and minus icons are next to IF, THEN, and ELSE blocks. You can use them to show or hide the block.

Now let us move to the first tutorial